Part 1 · Before you start
Google Cloud admin, once
Evinced has already enabled Gemini Enterprise sign-in on its side.
Connect Gemini Enterprise to Evinced Site Scanner MCP and ask Gemini about your accessibility scan results in plain language. An admin adds the connector once; then each person connects their own Evinced account.
Part 1 · Before you start
Google Cloud admin, once
Evinced has already enabled Gemini Enterprise sign-in on its side.
Part 2 · Add the connector
Gemini Enterprise admin, once
Part 3 · Start using it
Everyone, once each
You need admin access to Gemini Enterprise, an Evinced Site Scanner account, and about 15 minutes.
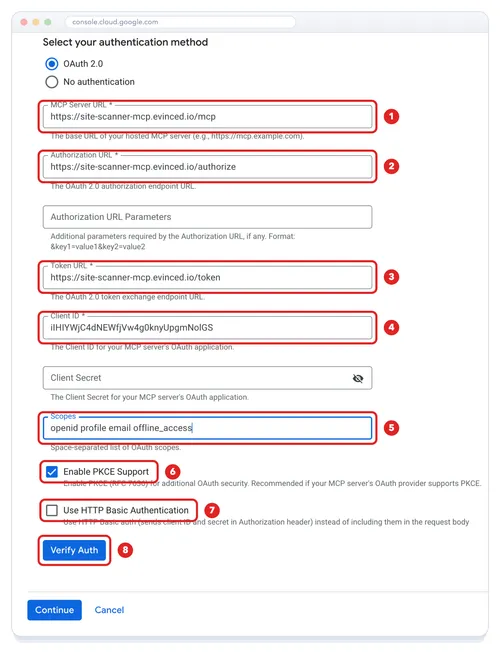
Every value used in steps 4, 6 and 7. Copy them exactly.
| Field | Value |
|---|---|
| MCP Server URL | https://site-scanner-mcp.evinced.io/mcp |
| Authorization URL | https://site-scanner-mcp.evinced.io/authorize |
| Authorization URL Parameters | Leave empty |
| Token URL | https://site-scanner-mcp.evinced.io/token |
| Client ID | iIHIYWjC4dNEWfjVw4g0knyUpgmNolGS |
| Client Secret | Leave empty |
| Scopes | openid profile email offline_access |
| Enable PKCE Support | On |
| Use HTTP Basic Authentication | Off |
| Data connector name | Evinced Site Scanner |
| Actions to enable | All of them |
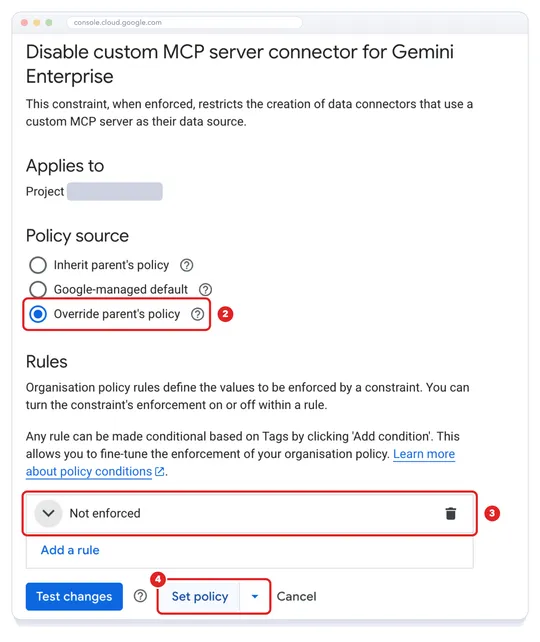
A Google Cloud admin checks this once.
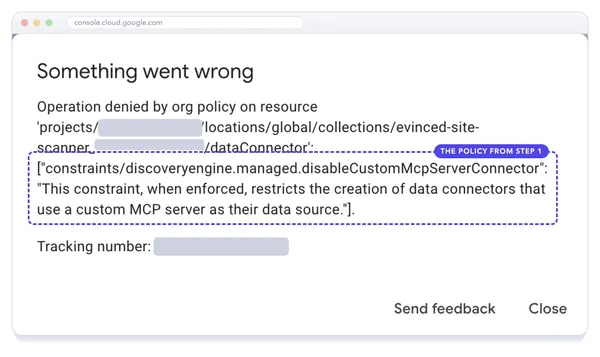
Google Cloud can stop Gemini Enterprise from connecting to custom MCP servers. If the policy below reads Enforced for your project, turn it off for that project only; the rest of your organization keeps it. You need the Organization Policy Administrator role.
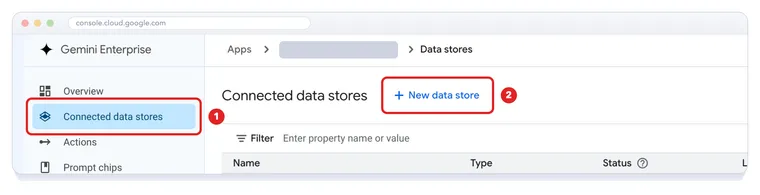
A Gemini Enterprise admin does this once.
In the Google Cloud console, open Gemini Enterprise in your project and select your app.
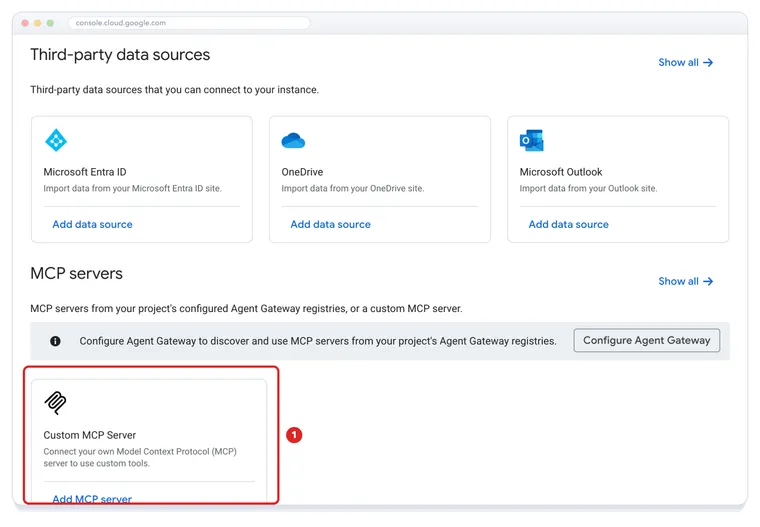
On Select a data source, scroll down to MCP servers.
Keep OAuth 2.0 selected. Leave Authorization URL Parameters and Client Secret empty.
MCP Server URL
https://site-scanner-mcp.evinced.io/mcpAuthorization URL
https://site-scanner-mcp.evinced.io/authorizeToken URL
https://site-scanner-mcp.evinced.io/tokenClient ID
iIHIYWjC4dNEWfjVw4g0knyUpgmNolGSScopes
openid profile email offline_accessEnable PKCE Support: on
Use HTTP Basic Authentication: off
Click Verify Auth.
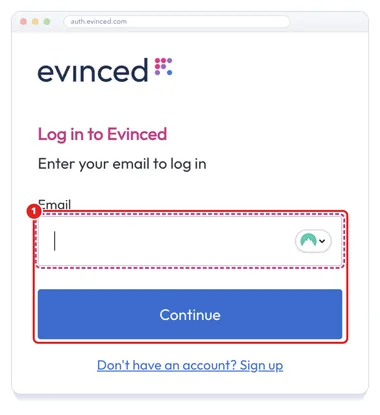
Verify Auth opens the Evinced sign-in in a pop-up.
Enter your Evinced email, click Continue, and finish signing in. The pop-up closes on its own.
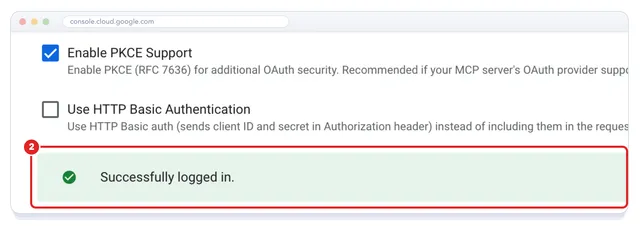
Check for Successfully logged in.
Scroll down and click Continue.
Location stays global (Global). The tag and the sensitive data protection policy are optional.
Evinced Site Scanner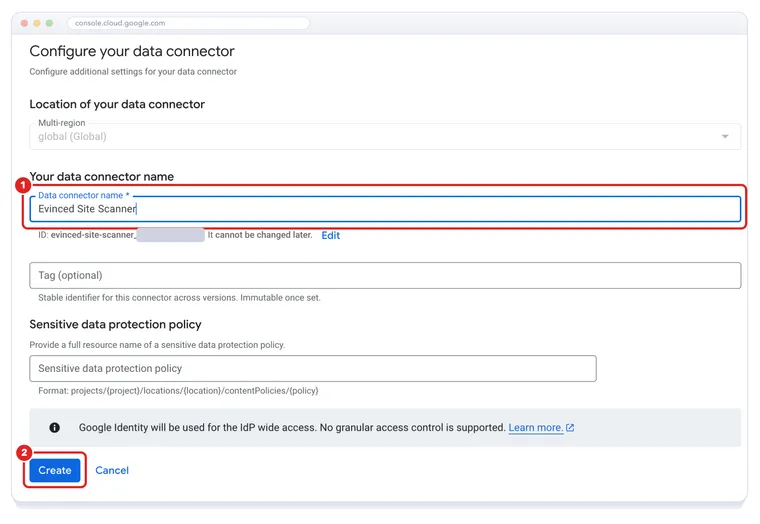
A new connector starts with every tool turned off. Gemini calls them actions.
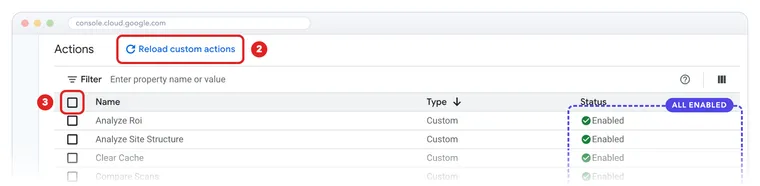
On the connector’s page, click Go to actions.

Click Reload custom actions and sign in to Evinced in the pop-up. The Site Scanner tools appear, all Disabled.
Tick Select all rows.
Click Enable actions. It appears once rows are selected.
Check that every action shows Enabled.
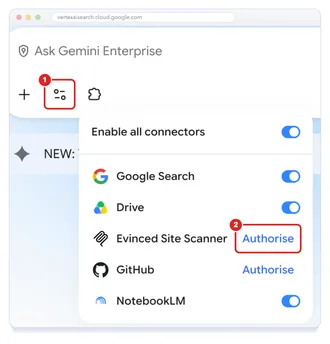
Everyone does this once, each with their own Evinced account.
Gemini works only with what your Evinced account can access.
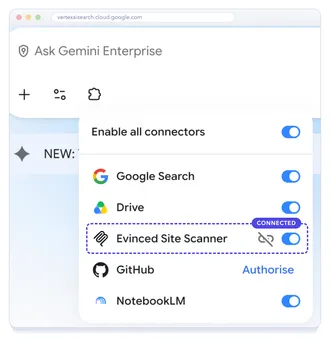
The whoami tool only reads. It’s the quickest way to check which account Gemini is using.
Start a chat and ask:
Use the Evinced Site Scanner connector to run its whoami tool.Gemini shows the tool it wants to run. Click Send.
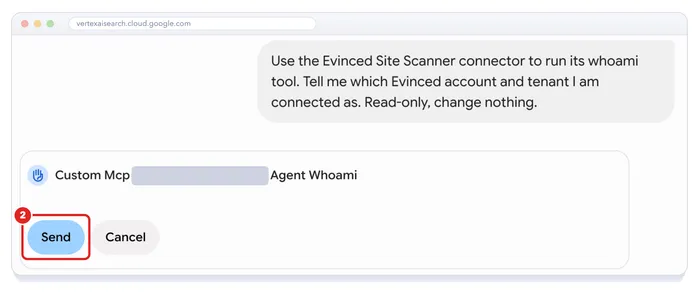
Gemini replies with the Evinced account and tenant it’s using.
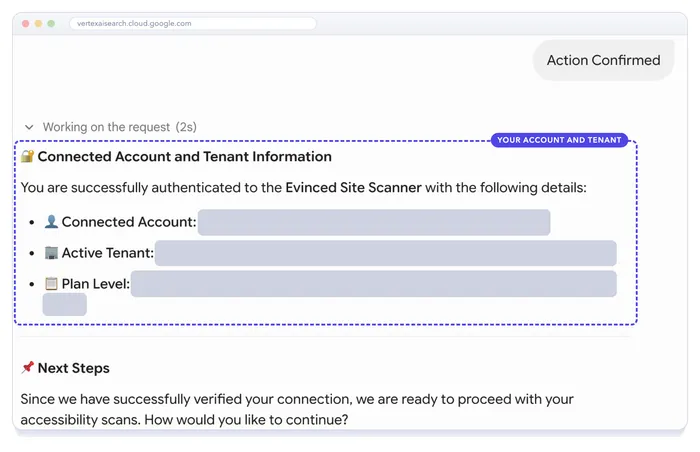
Ask in plain language. Gemini picks the Site Scanner tool that fits.
Ask about your sites, for example:
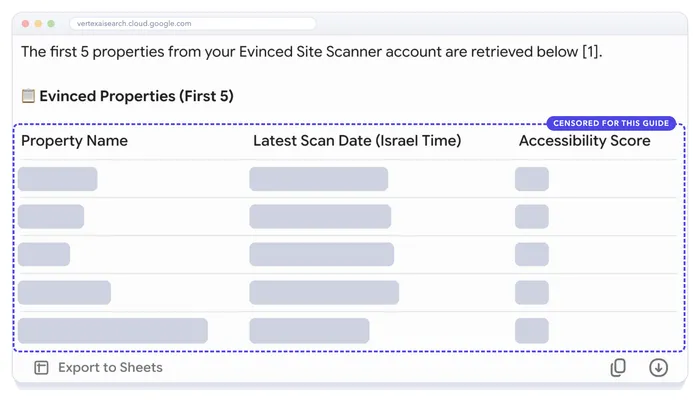
List my Evinced Site Scanner properties with their latest scan date and score.Check the details Gemini will send (here, how many properties) and click Send.
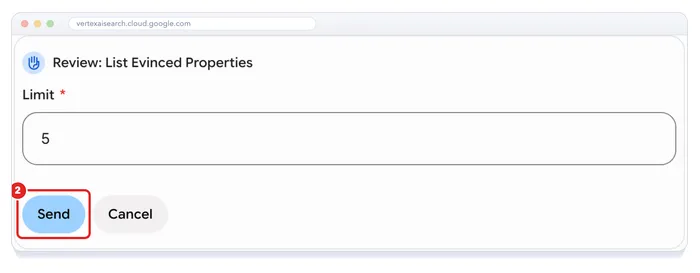
Gemini answers from your live Site Scanner data.
| What you see | What to do |
|---|---|
| “Operation denied by org policy” when you click Create | Your organization still blocks custom MCP servers for Gemini Enterprise. Complete step 1, wait a few minutes (up to 15), and click Create again. |
| “Callback URL mismatch” when you click Verify Auth | Evinced’s sign-in doesn’t recognise Gemini Enterprise. Email support@evinced.com. |
| “No actions are enabled” after you create the connector | Gemini can’t use any tool yet. Complete step 7: reload the actions, select all, and click Enable actions. |
| Evinced Site Scanner shows “Authorise” (or “Authorize”) in the Gemini app | That’s expected the first time. Click it and sign in with your Evinced account (step 8). |
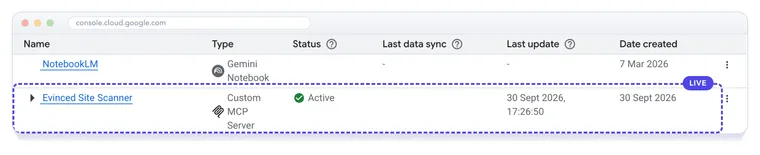
Evinced Site Scanner is live in Gemini Enterprise. Each person connects their own Evinced account once, and Gemini asks before each tool call.